The Ultimate Guide to Fiberglass Yacht Repair
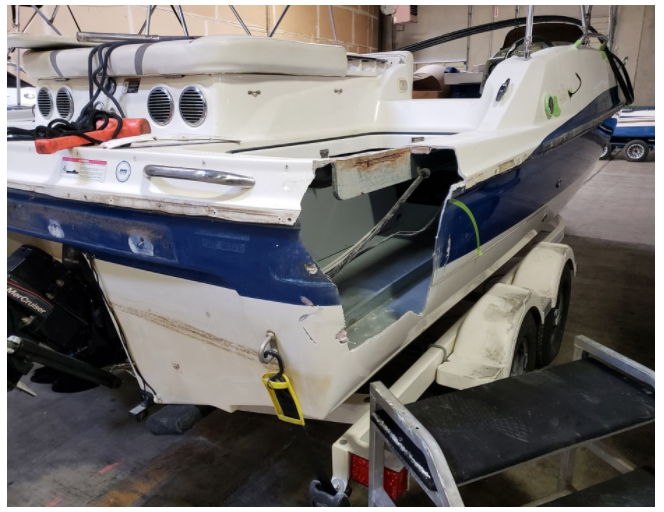
Fiberglass yachts are renowned for their sleek design, durability, and resistance to the elements. However, like any vessel, they are not immune to wear and tear. Damage can occur from factors such as collisions, grounding, or general exposure to the marine environment. Understanding the essentials of fiberglass yacht repair is crucial for maintaining the integrity and performance of your vessel. This guide provides detailed insights into the repair process, ensuring your yacht remains seaworthy and aesthetically pleasing.
Understanding Fiberglass Damage
Before embarking on any repair, it is essential to assess the extent of the damage. Fiberglass damage can manifest in several forms:
- Surface Scratches: Minor abrasions that affect the gelcoat but do not penetrate the fiberglass structure.
- Cracks: These can be either cosmetic, affecting only the gelcoat, or structural, compromising the fiberglass laminate.
- Blisters: Often caused by water infiltration, blisters can lead to delamination if not addressed.
- Punctures: More severe than cracks, these holes penetrate through the fiberglass, requiring immediate attention.
Preparation for Repair
Proper preparation is the cornerstone of effective fiberglass yacht repair. Follow these steps to ensure a successful repair process:
- Clean the Area: Remove any dirt, grease, or contaminants to ensure the repair materials adhere properly.
- Assess the Damage: Use a chisel or grinder to expose the full extent of the damage for an accurate evaluation.
- Plan the Repair: Determine the materials and tools required, ensuring they are suitable for the specific type and extent of damage.
Repair Techniques
Surface Scratch Repair
For minor scratches, the repair process is relatively straightforward:
- Sand the Area: Use fine-grit sandpaper to smooth out the scratch and prepare the surface.
- Apply Gelcoat: Mix and apply gelcoat to the sanded area, following the manufacturer’s instructions.
- Polish the Surface: Once cured, buff the area to restore the yacht’s original finish.
Crack and Puncture Repair
Addressing more severe damage, such as cracks or punctures, requires a more involved approach:
- Grind Out the Damage: Use a grinder to remove damaged material and create a beveled edge around the affected area.
- Layer Fiberglass Mat: Cut fiberglass mat to size, layering it within the beveled area with resin, ensuring each layer is properly saturated.
- Apply Gelcoat: Once the fiberglass has cured, sand the surface smooth and apply gelcoat to match the surrounding area.
Final Touches and Maintenance
After completing the fiberglass repair, a few final steps help ensure the longevity and appearance of the repair:
- Inspection: Check the repaired area for any signs of incomplete bonding or imperfections.
- Regular Maintenance: Implement a routine maintenance schedule to monitor and address any emerging issues early.
Keeping your yacht in top condition requires regular attention and the occasional need for professional fiberglass yacht repair. By understanding the repair process and recognizing when it’s time to seek expert assistance, yacht owners can ensure their vessels remain safe and visually appealing for years to come.
